
Planning a road trip can be fun, and Google Maps has many useful tools to help you do it quickly. By taking things one step at a time, you can ensure that your road trip is well-planned and fun.
Now for the exciting part: making travel plans. This is how I go about it:
Step 1: Generate a new custom map

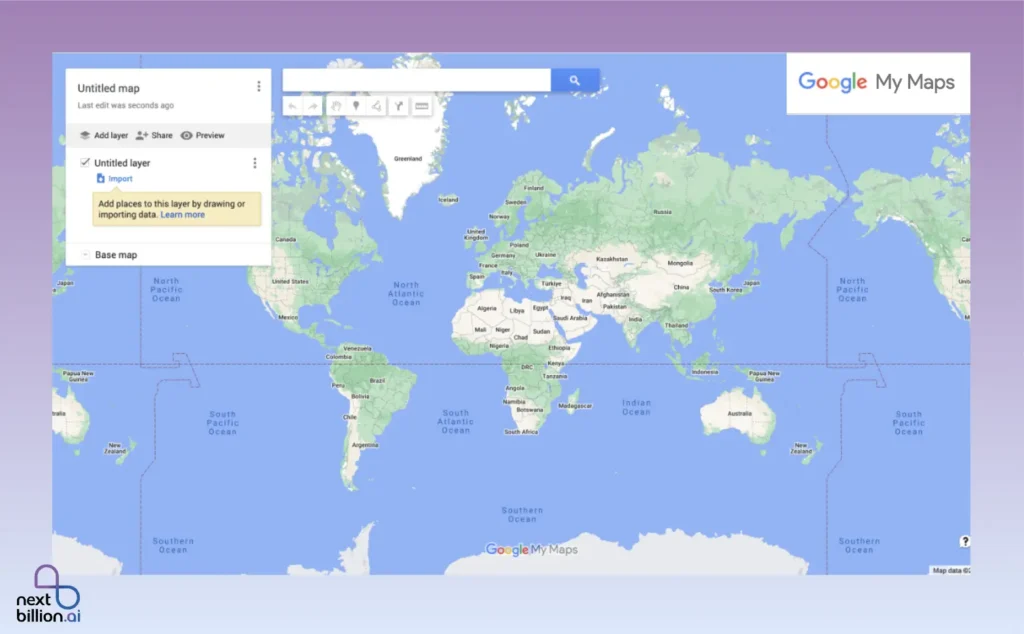
To begin using Google Maps to plan your travel, go to https://www.google.com/mymaps. Then, click the “Create a New Map” button on your My Maps dashboard.
You’ll have a ton of options when maps open up. Give your map a name first. When you select “Untitled Map,” a dialog box containing the map’s name and description will appear.
I’m organizing a three-day trip to Gangotri in India for this example. We’ll refer to this map as “Road Trip to Gangotri.”
You can add your locations to your map once you’ve given it a name.
Step 2: Include and personalize your places
The exciting part is about to begin: adding every location you want to see while traveling. I’m going to assume that you already have a list of locations, but if you don’t, use this opportunity to learn about the city and compile a list of attractions.
Making a list will greatly facilitate and expedite the planning process.
Google Maps uses “pins” to represent your locations. Use the search bar to find the location of interest before you begin adding pins.
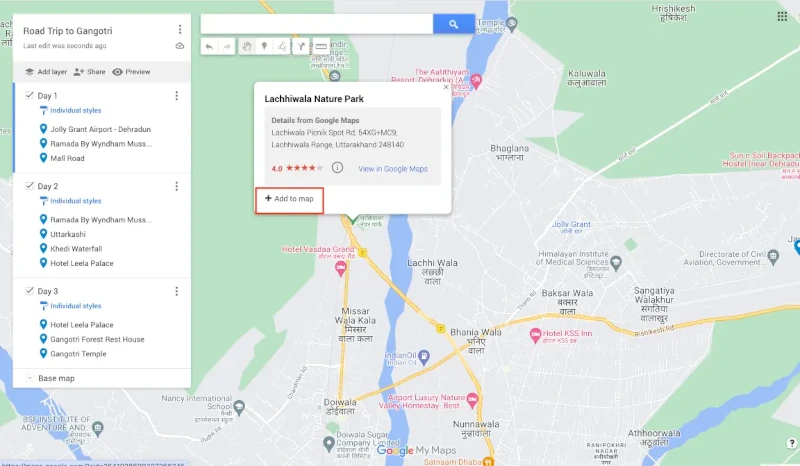
Let’s begin with one of Mussories’s most well-known landmarks: Lachhiwala Nature Park.
When you search for a location, maps will enlarge it and give you the option to “Add to Map.” You can add the point of interest to your map layer by clicking or tapping this button.
You can alter each point of interest’s color and icon to help you keep your pins more arranged.
![]()
A paint can icon will appear when you hover over the address. To access your customization choices, click it. You can select from a variety of icons on Google Maps, such as those for monuments, museums, gardens, and more.
Thanks to these icons, understanding each destination is a bit simpler. Additionally, that may facilitate the following step.
Step 3: Divide your journey into several layers or categories
While trip planning can be exciting and fun, if you don’t keep things organized, it can quickly turn chaotic and disorganized. You’ll be able to stay on top of everything by organizing your trip into layers or categories.
Here, I’m organizing a road trip to Gangotri. I should plan my trip in days so I can decide which attractions I want to see each day. Every day in this instance, will represent a new layer or category.
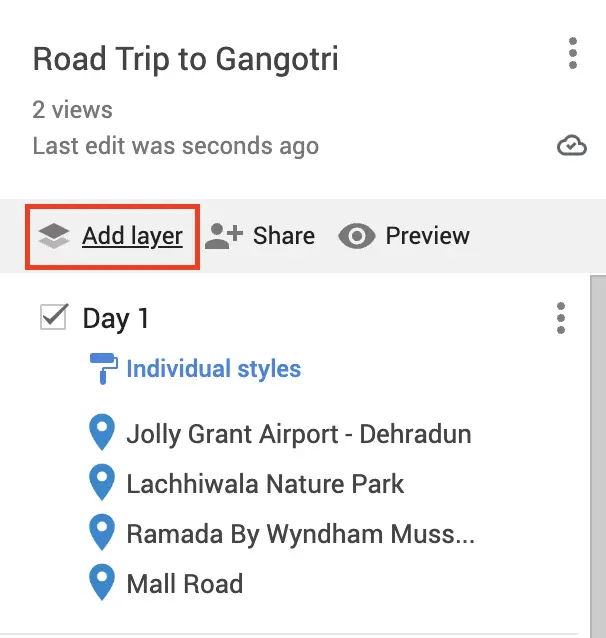
In order to arrange things, I can select “Add layer.” Every level will represent a novel “category.”
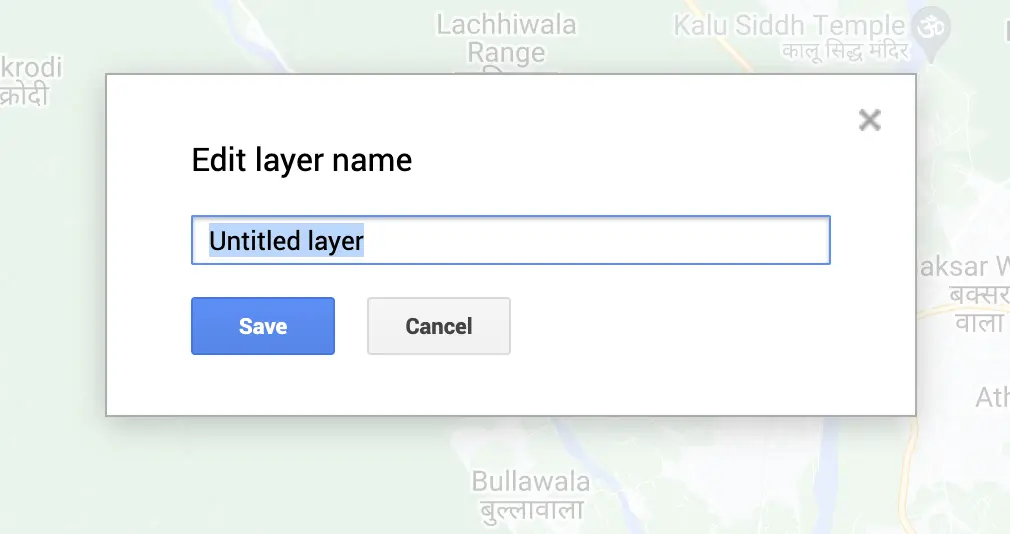
After selecting “Add layer,” you can give it a name. Take out “untitled layer” and replace it with your name. I’m going to add three layers in this example, naming them “Day 1,” “Day 2,” and “Day 3.”
After setting that up, I can begin arranging my daily points of interest.
You are free to include any categories (or layers) in your trip plan as long as they are relevant.
If you’re organizing a road trip itinerary, for instance, you might decide to divide your journey into cities and include attractions in each one. Perhaps you would like to create categories for foods or particular interests. You can tailor Google Maps to your own travel preferences and style, which is a great feature.
How many levels is a map capable of having?
Although layers can help keep your map organized, don’t use them excessively. The maximum number of layers you can add is ten.
It might be necessary to carefully organize your layers or categories if you’re organizing a large, intricate trip.
For every layer, how many location pins can you add?
You can customize each map you make in My Maps with up to 2,000 different pins.
Step 4: Make travel arrangements
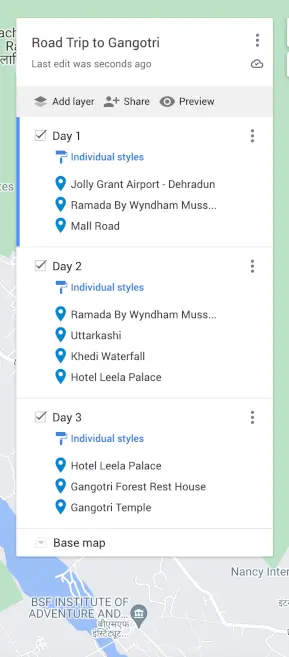
Now that you have established all of your categories, you can begin creating your schedule. Organizing points of interest into distinct layers or categories is simple. To move the pin, simply click and drag it to the desired location.
In our example, I made three layers, one for each day, so I dragged each point of interest into the appropriate layer to plan my itinerary.
What happens, though, if you don’t divide your trip into days? What happens if you group your points of interest by city or category (restaurants, museums, etc.)?
Not a problem! You are free to arrange your layers however you see fit. The key is that Google My Maps facilitates easy trip visualization. You can quickly determine which points of interest are adjacent to one another. This makes making your itinerary in a digital planner or on paper simple.
Step 5: Make reservations
Now that you have arranged your travel, you can begin:
- Make hotel reservations
- Making reservations for car rentals
- Making reservations for any tickets that may be required.
Plan your reservation as far in advance as you can. There’s a chance that rooms and tickets will sell out if you wait too long.
Step 6: Cite off your map
You can give your itinerary and map to friends and family if you’re traveling with them.
Here’s how to do it:
- Return to the Google My Maps dashboard’s main screen.
Select the share option (the arrow symbol) on the newly generated map.
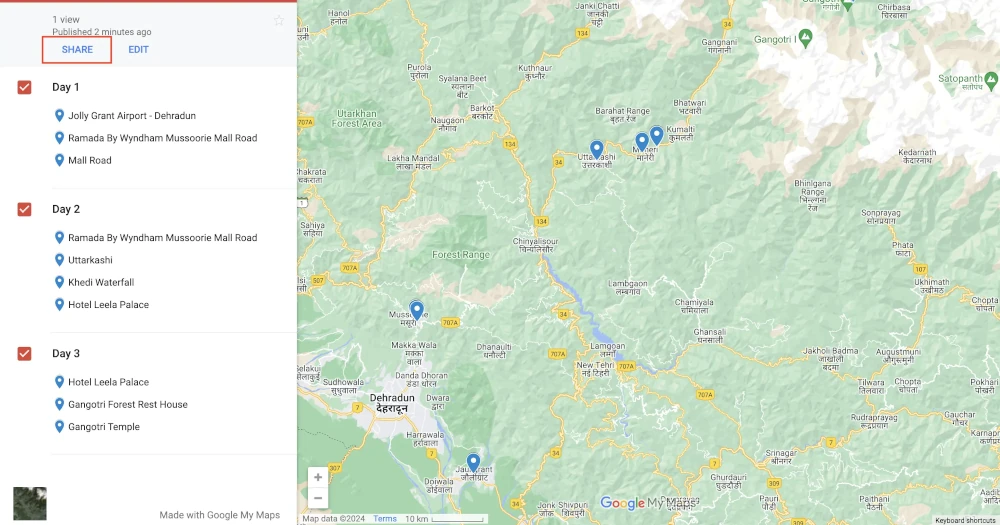
You can use Twitter, Facebook, or email to share your map. If you have a website, you can also integrate your map into it.
Step 7: Use your phone to access your map
You’ve made your map and distributed it among your pals. However, you must have the Google Maps app installed on your phone in order to use it.
To view your maps on a mobile device, follow these steps:
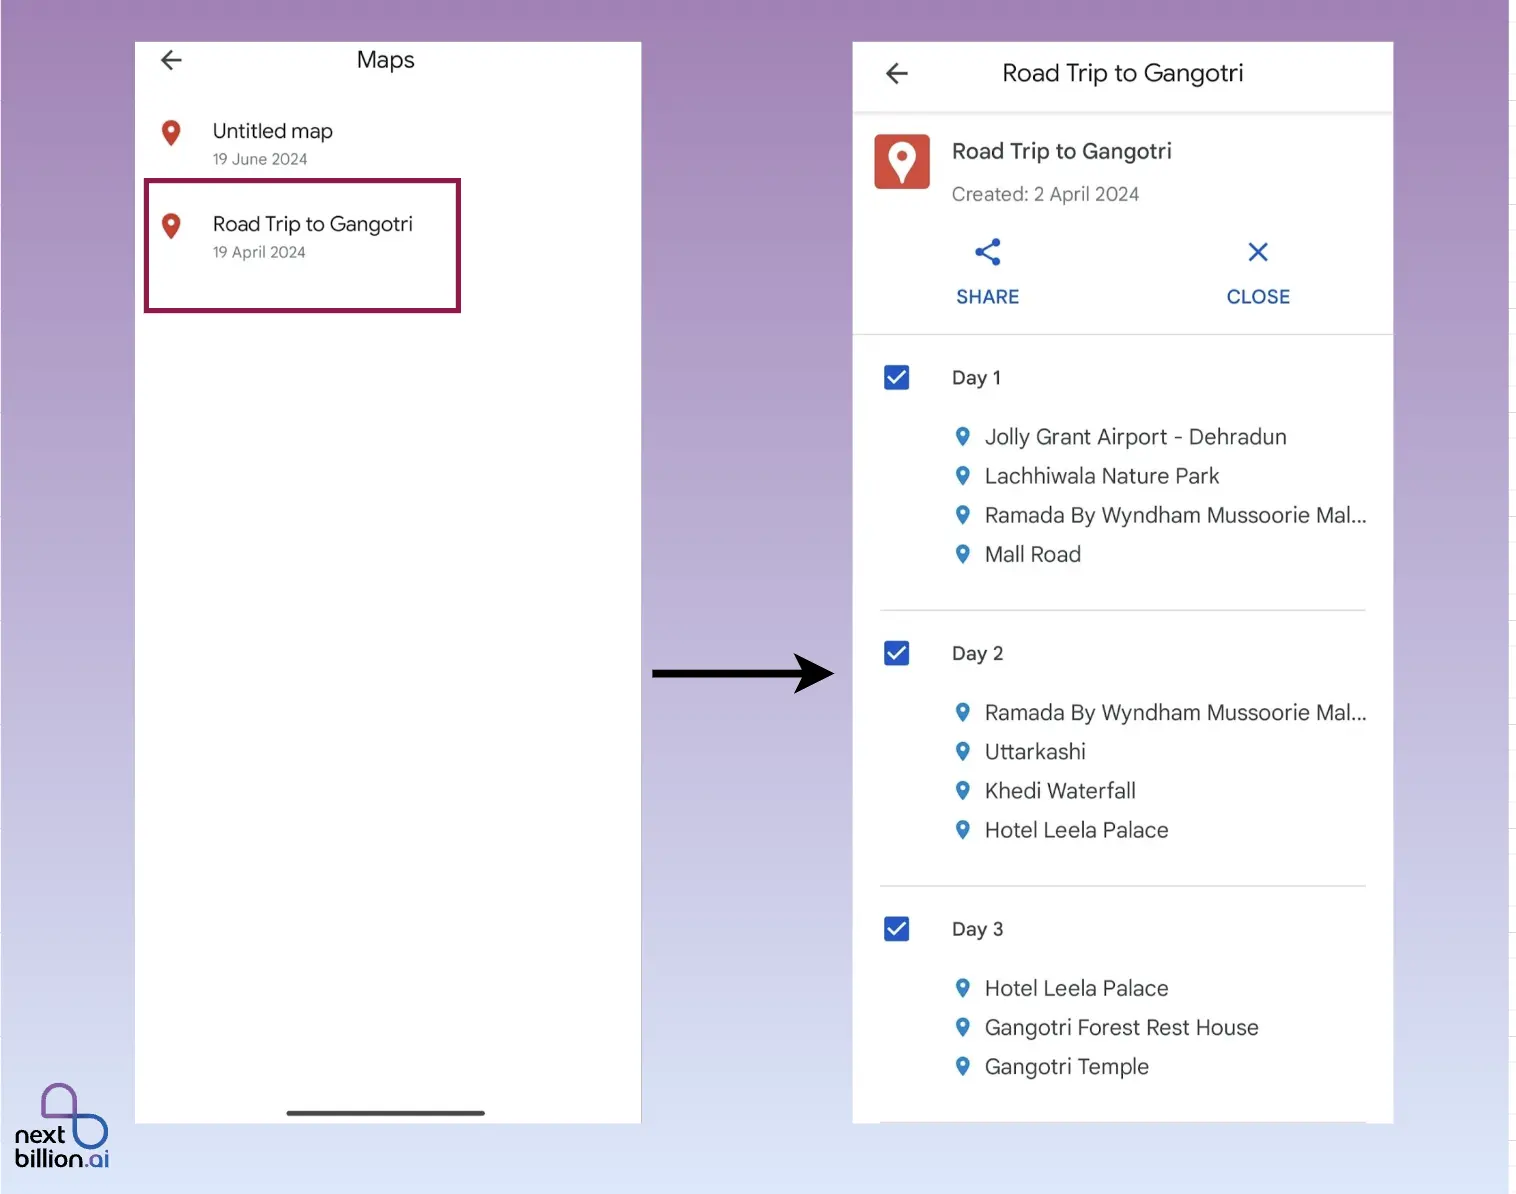
- Launch the Google Maps application.
- Select Saved.

- Click Maps at the bottom.
- Select the map of your trip from the list.
Stay ahead in mapping and location technology!
When used as a full itinerary planner, Google Maps isn’t as useful as it could be for finding your way and planning your routes. Here are three major problems that could make planning your trip harder, especially if you want more detailed and personalized help.

1. Lack of Detailed Itinerary Management
Google Maps does a great job of giving directions and showing routes, but it doesn’t do a great job of managing schedules. When travelers need to make a detailed itinerary with activities, accommodations, and scheduled events, Google Maps isn’t the best tool for organizing and managing all of these parts.
- Limited Activity Planning: Google Maps lets you add more than one stop, but it doesn’t let you schedule activities or events in detail at each one. You can’t give each stop a time limit or make a schedule for your trip.
- No Integration with Other Tools: Unlike specialized itinerary planners, Google Maps does not work with other travel planning services and tools, like booking systems for hotels, restaurants, or tours. This makes it harder to keep track of all the details of your trip.
2. Poor Collaboration and Sharing Options
Google Maps doesn’t have as many features for planning trips with a group as dedicated trip-planning apps. You can share routes and locations, but it doesn’t have the advanced tools for working together that many travelers need.
- Simple Sharing Options: You can email or post on social media to share routes and locations, but Google Maps doesn’t offer a central location for groups to work together. You can’t edit an itinerary together with other people or see what changes other users have made.
- Lack of Interactive Features: Unlike trip planning apps that provide interactive features such as voting on activities, commenting, and assigning tasks, Google Maps lacks these capabilities, making it less effective for collaborative planning.
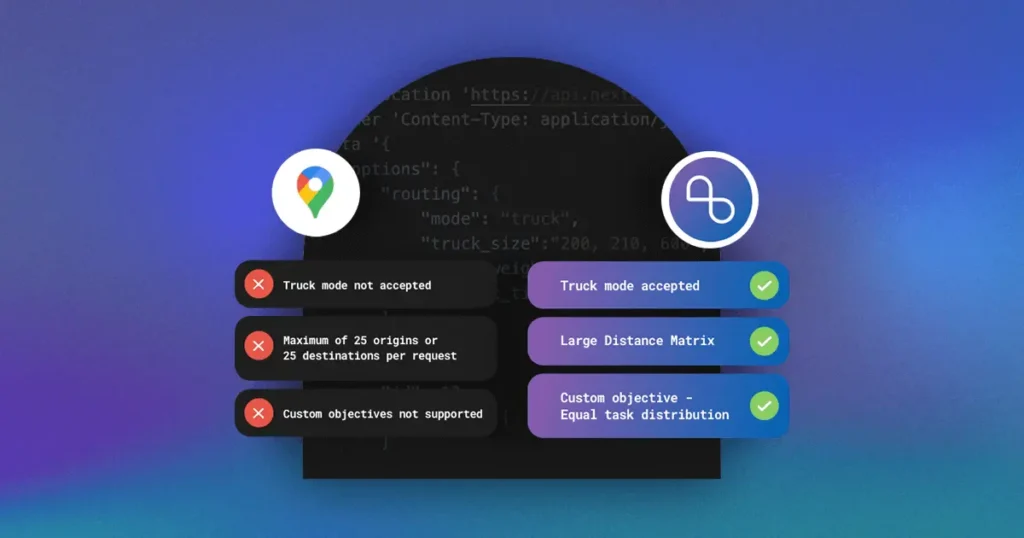
3. Limited Flexibility and Customization
Google Maps API has powerful mapping and routing features, but it’s not very flexible or easy to customize:
- Predefined Functions: The API is made to provide certain functions, like geocoding, routing, and mapping. It can be hard to change these features to fit the needs of a specific business, and you often have to find ways to get around problems.
- Limited Access to Data: The API might not fully allow access to or customization of some data, like real-time traffic and historical traffic patterns. This could make it harder to create highly customized routing solutions.
Travelers who want a more powerful and adaptable way to plan their trips. Travel planning apps might be a better choice for people who need more advanced features for making itineraries.
A lot of people use Google Maps to plan simple routes, but it might not always work for businesses and advanced users who want more powerful and flexible tools. Nextbillion.ai is a better alternative that can handle the needs of complex logistics and delivery operations with its advanced route optimization features.
Why Should You Use Nextbillion.ai to Plan Your Route?
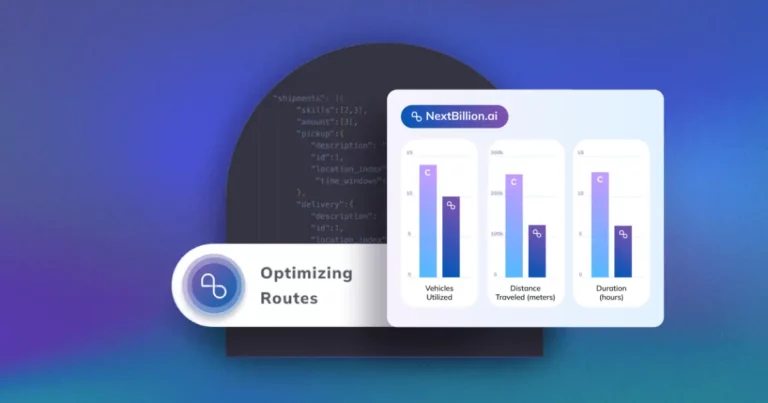
NextBillion.ai offers a complete and adaptable Route Optimization API that is meant to boost productivity, reduce time and money wasted, and raise efficiency.
NextBillion.ai’s API is better than Google Maps because it can handle both Single and Multi-Vehicle Routing Problems (VRP). This makes it perfect for companies that need to handle complicated logistics.
Customization and Flexibility: NextBillion.ai lets you change the routing algorithm to fit your needs, taking into account things like delivery priorities, time windows, and vehicle capacity. This customization ensures that you get the best routes for your business.
Real-Time Adaptability: The API uses real-time traffic data to change routes on the fly, which is very important for keeping things running smoothly when traffic conditions change. This feature cuts down on wait times and makes the best use of resources.
Scalability: NextBillion.ai’s API can be used to manage either a small fleet of vehicles or a large cluster of vehicles with a lot of moving parts. It can handle up to 4000 tasks in a single route optimization problem, which makes it good for large-scale operations.
How to Use NextBillion.ai to Plan Your Routes?
Here are the steps you need to take to start planning your route with NextBillion.ai:
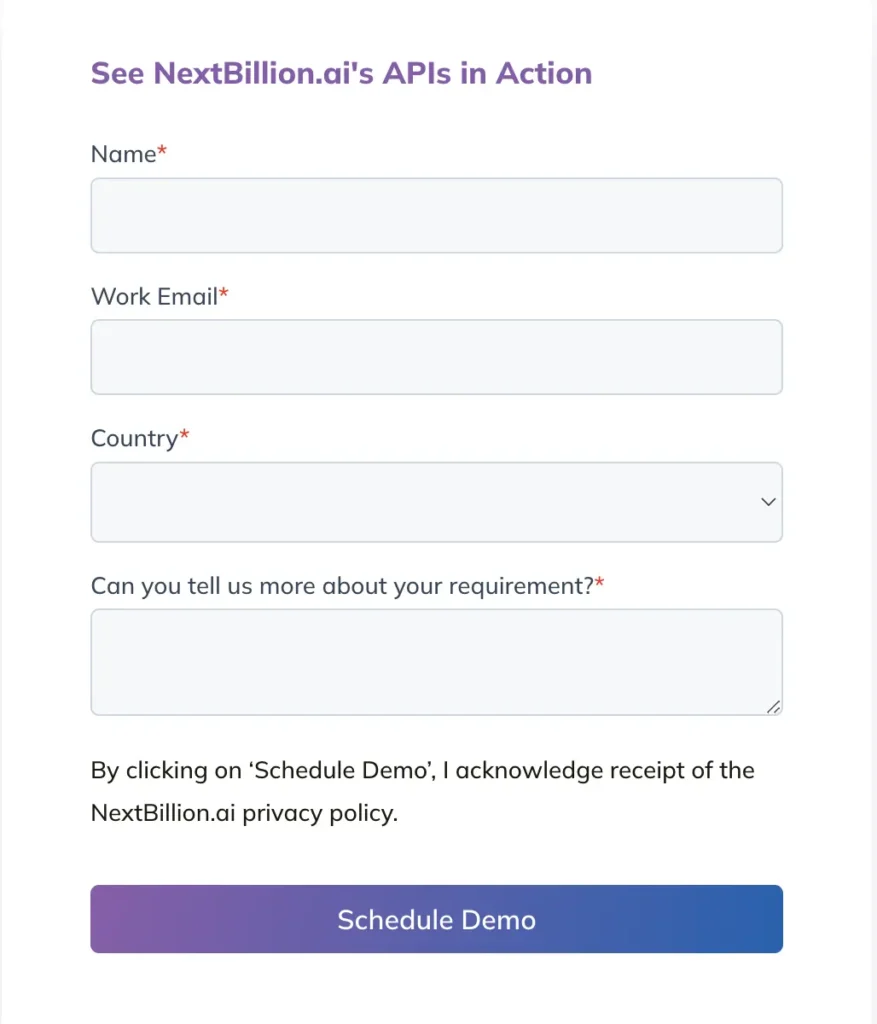
Step 1: Sign up and get your API key
Contact NextBillion.ai to sign up. Once your business account is set up, the team will provide an API key. The API key acts as an authentication mechanism for your API requests.
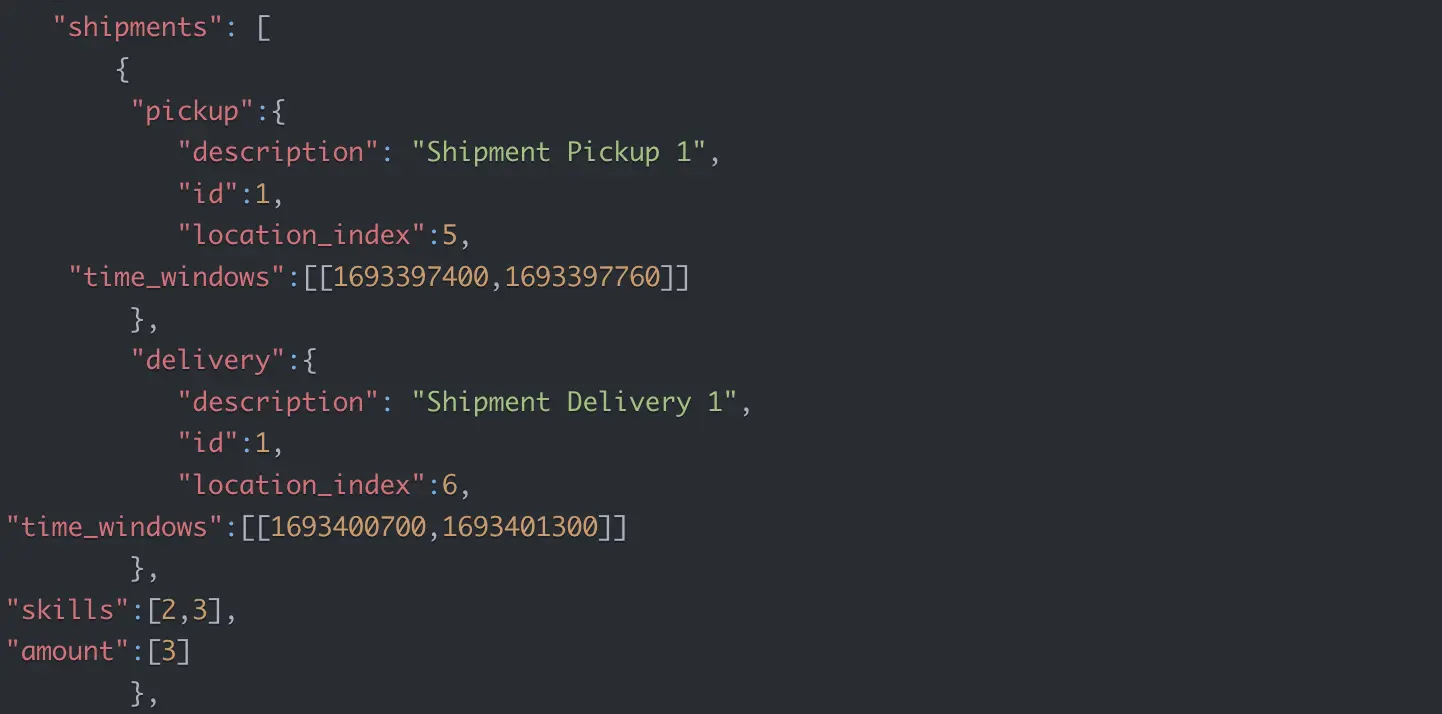
Step 2: Compile your input data to use

Find out about your jobs (like where to deliver), your vehicles (like fleet information), and your shipments (like pick-up and delivery tasks).

Put this information in the JSON format. This information will be sent to the API in the form of a POST request.
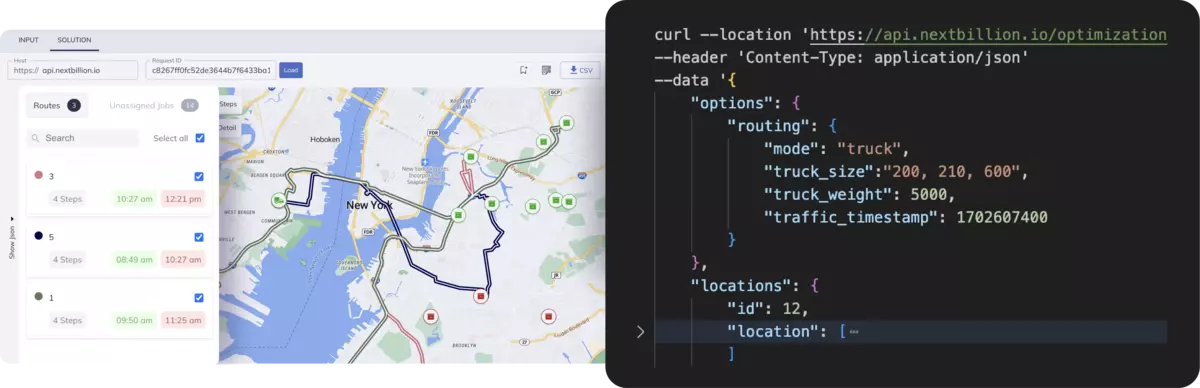
Step 3: Set up the parameters for optimization
To send your routing problem, use the Optimization POST method. In the options object, you should define your goals, constraints, and preferences.

You can also improve your routes even more with advanced features like re-optimization, order grouping, or task sequencing.
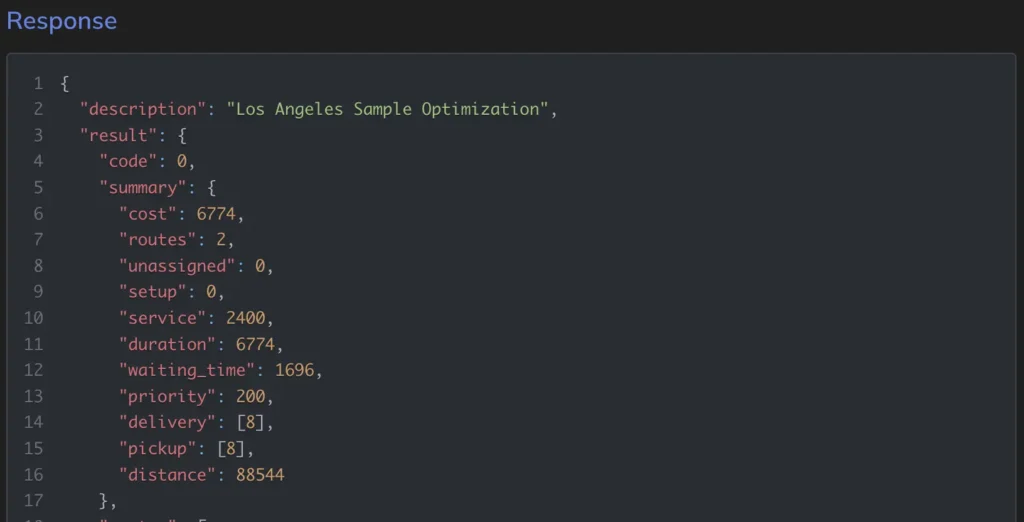
Step 4: Get optimized routes and use them
You will be given a unique task ID once your optimization request is sent.

To get the optimized routes based on the task ID, use the Optimization GET method.

When you use these routes in your logistics, you’ll start getting better planning results.
Refer to the tutorials page for a more detailed understanding of Route Optimization API.