Table of Contents
Route planning plays a vital role in logistics and daily business operations. It helps businesses deliver goods and services efficiently, saving time, reducing costs, and improving customer satisfaction.
For small businesses and startups, investing in expensive software might not always be practical. This is where Excel comes in as a simple and affordable tool. Its flexibility allows you to customize templates that fit your specific needs, making it a great option for those starting with route planning.
In this guide, we’ll show you how to use Excel for route planning and create your own custom template. Whether you’re new to this process or looking to improve your current methods, this article will provide the steps and tips you need to get started.
Why Use Excel for Route Planning?
Excel is a practical choice for route planning, especially for small businesses or those just starting out. Here’s why it works:
Advantages
Cost-Effectiveness
Excel is affordable and often comes as part of standard office software packages. There’s no need to invest in expensive route planning software when Excel can handle the basics.
Easy Customization
With Excel, you can create templates tailored to your specific needs. From organizing delivery stops to calculating distances, you have the flexibility to design a system that works for your business.
Familiarity
Most people are familiar with Excel, making it easy to use without extensive training. Its intuitive interface and built-in functions allow users to get started quickly.
Limitations
While Excel is a great starting point, it does have limitations. It’s not ideal for handling large-scale operations with hundreds of stops or for managing real-time updates. As your business grows, you may need to consider more advanced software that can scale with your needs.
Excel is a powerful tool for smaller operations, but knowing its strengths and limitations will help you use it effectively.
Step-by-Step Guide to Route Planning Using Excel
Planning routes in Excel is straightforward and can help you manage deliveries or assignments more efficiently. Follow these steps to create and use your own Excel template for route planning.
Step 1: Gather Your Data
Start by collecting all the necessary information for your route planning. Here’s what you’ll need:
- Delivery Locations: Include all addresses or coordinates for your stops.
- Time Windows: Note any specific times for deliveries or pickups.
- Driver Availability: Record each driver’s working hours and availability.
Tips for Organizing Data:
Create a clear column layout for your data. For example:
- Column A: Stop Name
- Column B: Address
- Column C: Priority Level
- Column D: Time Window
- Column E: Driver
Step 2: Set Up the Excel Template
Use Excel to organize your data in a clean and logical format. Create the following columns:
Stop Name | Address | Distance | Estimated Time | Notes |
Stop 1 | 123 Main Street | Fragile Items | ||
Stop 2 | 456 Elm Road | Urgent |
How to Set Up:
- Open a new Excel workbook.
- Label the columns based on the data you’ve gathered.
- Fill in the table with the stops and any known information.
Step 3: Calculate Distances and Times
You can manually enter distances or use Excel formulas for calculations.
Manual Entry:
- Look up distances between stops using online maps and enter them in the “Distance” column.
Using Excel Formulas:
If you have latitude and longitude data, use the Haversine formula to calculate distances between two points. Example formula:
=ACOS(COS(RADIANS(90-Lat1))*COS(RADIANS(90-Lat2))+SIN(RADIANS(90-Lat1))*SIN(RADIANS(90-Lat2))*COS(RADIANS(Lon1-Lon2)))*6371 |
Note: The above formula calculates the distance in kilometers.
Use NextBillion.ai’s Distance Matrix API to automate distance calculations and import data into Excel.
Step 4: Optimize Routes
With your data organized, use Excel’s built-in tools to optimize routes:
1. Sort and Filter:
Sort stops by priority, distance, or time window to create a logical sequence.
2. Conditional Formatting:
Highlight time-sensitive stops to ensure they are scheduled first.
3. Manual Adjustments:
Rearrange stops based on driver availability or specific delivery constraints.
Step 5: Test Your Template
Once your template is ready, test it with real or simulated data:
- Run Test Scenarios:
- Input example routes to see if the plan works efficiently.
- Check for gaps, delays, or conflicts in the schedule.
- Input example routes to see if the plan works efficiently.
- Refine the Template:
- Adjust formulas, add columns, or update sorting methods based on test results.
- Gather feedback from drivers or team members to make improvements.
- Adjust formulas, add columns, or update sorting methods based on test results.
By following these steps, you’ll have a functional route planning template that can be tailored to your needs. Excel is a flexible tool for small-scale route planning, and testing your template will ensure it works effectively for your operations.
Route Planning with Google Maps using Excel
Many small businesses rely on Google Maps as a free and easy-to-use route planner. Whether you’ve used it to find directions to a restaurant or check real-time traffic updates, Google Maps is accessible and familiar. By combining it with Excel, you can create a multi-stop route plan that fits your business needs.
However, using Google Maps for route planning comes with a few challenges:
- Google Maps allows up to 10 stops per route (expandable with tools like More Than 10).
- Google My Maps increases this to 100 stops, but stops must be grouped into batches of 10.
- There’s no built-in way to optimize routes based on constraints like delivery windows or vehicle capacities.
- Drive times exclude the time spent at stops, which can affect route accuracy.
Despite these limitations, Google Maps paired with Excel can be a great solution for small-scale route planning. Let’s walk through the process.
Planning Routes with Google Maps
Google Maps makes it simple to plan and visualize routes.
- Prepare Your Spreadsheet in Excel
Organize your stops in a table with the following columns:
Stop Name | Address | Priority | Notes |
Stop 1 | 123 Main Street | High | Fragile Items |
Stop 2 | 456 Elm Road | Low | None |
- Add Stops to Google Maps
- Copy the first address from your spreadsheet.
- Open Google Maps and click Directions.
- Paste the address as the starting point.
- Continue adding addresses as stops until you reach the limit of 10 stops.
- Reorder Stops for Efficiency
Drag and drop stops in the list to create a more logical or efficient route.
- Save or Share the Route
Once the route is finalized, save it for reference or share it with your drivers.
💡 For step-by-step visuals, explore the guide on creating multi-stop routes in Google Maps.
Using Google My Maps for Larger Routes
Google My Maps allows for up to 100 stops, but with additional setup steps.
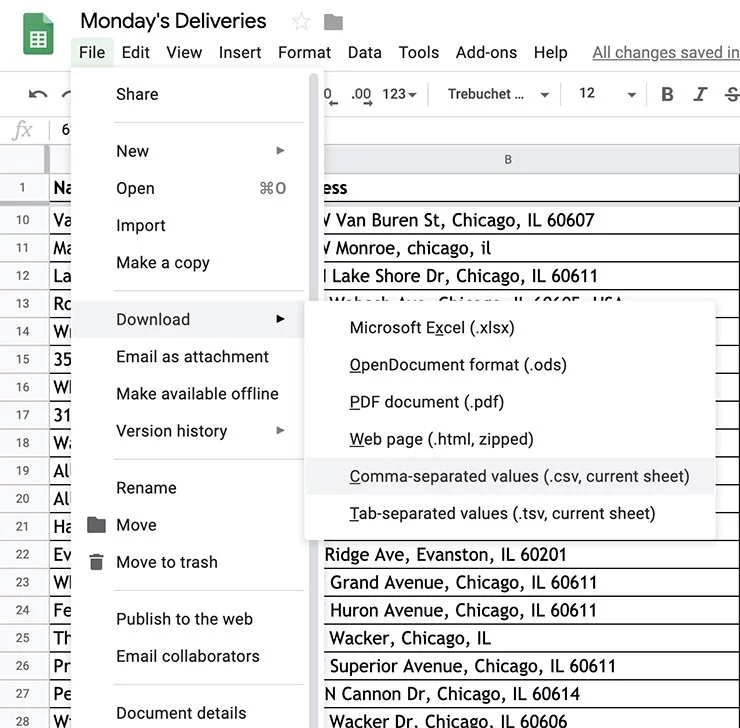
1. Export Your Data to CSV:
- In Excel, go to File > Save As and choose CSV as the file format.
- Ensure your data includes columns for stop addresses and any other details like names or delivery notes.
- In Excel, go to File > Save As and choose CSV as the file format.
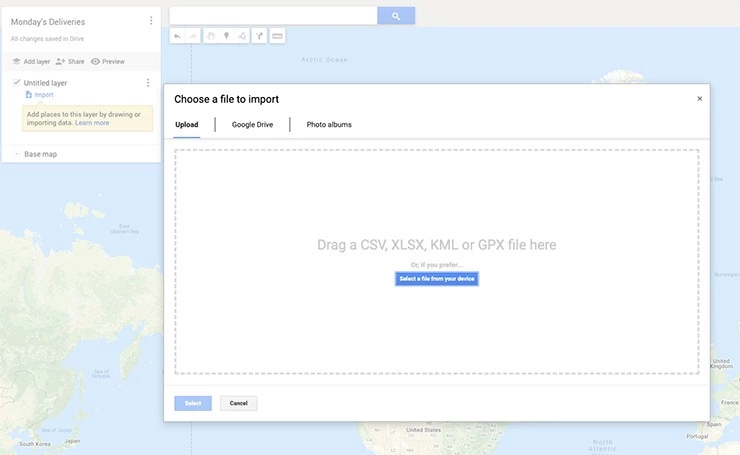
2. Import Your CSV File into My Maps:
- Visit My Maps and click Create a New Map.
- Use the Import option to upload your CSV file.
- Visit My Maps and click Create a New Map.
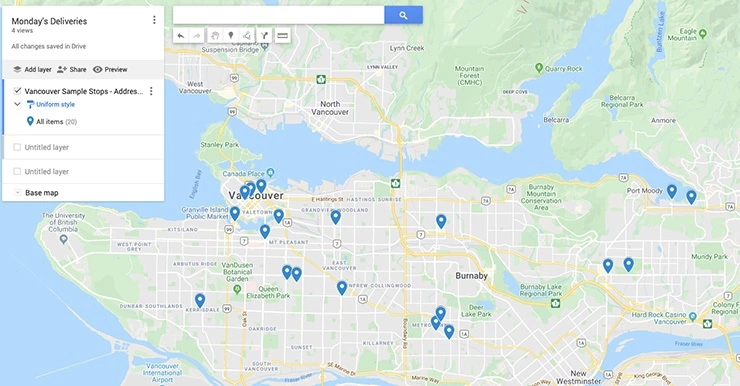
3. Plot Stops on the Map:
- Choose the address column to position stops on the map.
- Assign names or titles to each stop based on your spreadsheet.
- Choose the address column to position stops on the map.
4. Group Stops into Batches
My Maps allows up to 10 stops per layer. Organize stops into layers for routes, keeping each batch manageable.
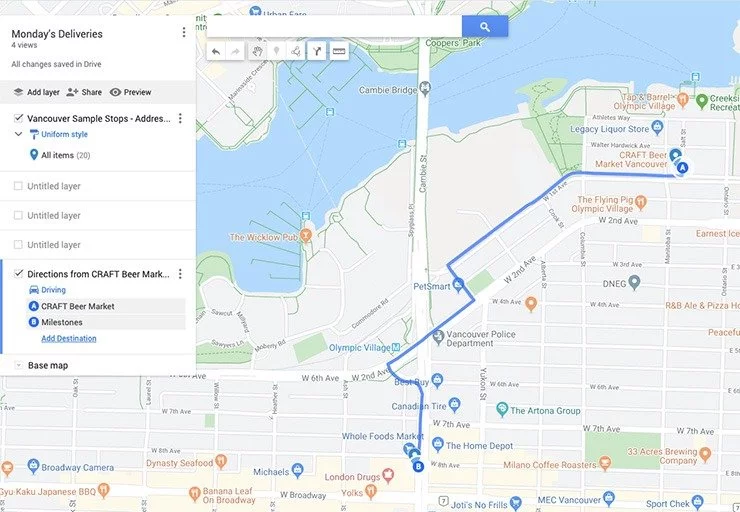
5. Build Delivery Routes:
Click on a stop to start directions, then add other stops manually.
Drag and reorder stops to refine the route.
Workarounds for Route Timing
To address Google Maps’ lack of stop-duration data:
- Batch stops into morning and afternoon routes for better control.
- Manually estimate the time spent at each stop and add it to the total travel time.
Benefits and Limitations of Route Planning on Google Maps Using Excel
Benefits:
- Free and Accessible: Works on desktop and mobile devices.
- Familiarity: Easy to use for personal and professional purposes.
- Visualization: Provides a clear map view with traffic updates.
Limitations:
- Requires manual optimization for stop sequences.
- Limited to 10 stops per route without additional tools.
- Lacks features for complex logistics like time windows and driver breaks.
By combining Google Maps with Excel, you can create efficient, small-scale route plans. For larger or more complex operations, consider integrating additional tools or upgrading to dedicated route optimization software.
Google Maps is a practical tool for small-scale route planning with up to 100 stops. However, as businesses grow, managing routes manually becomes increasingly complex. Mid-to-large-scale operations often require more advanced solutions that can handle higher volumes, diverse constraints, and optimization needs.
When to Move Beyond Excel for Route Planning Needs
Excel is a versatile and cost-effective tool for route planning, especially for small businesses and startups. However, as your operations grow, there may come a point where Excel’s limitations hinder efficiency. Here are some clear signs it’s time to consider moving beyond Excel:
Signs Your Operations Have Outgrown Excel
- Handling Hundreds of Stops Daily
Managing a large volume of stops can become unmanageable in Excel. Manually inputting data, sorting routes, and ensuring accuracy are time-consuming and error-prone tasks. - Need for Real-Time Updates
Businesses that require real-time route adjustments based on traffic, delays, or unexpected changes find Excel inadequate. Excel cannot dynamically update routes, making it less suitable for fast-paced operations. - Dynamic Optimization Requirements
Advanced constraints like delivery time windows, vehicle load capacities, or driver breaks cannot be efficiently handled in Excel. This limits the ability to optimize routes for maximum efficiency and cost savings.
Introducing Advanced Route Optimization Solutions
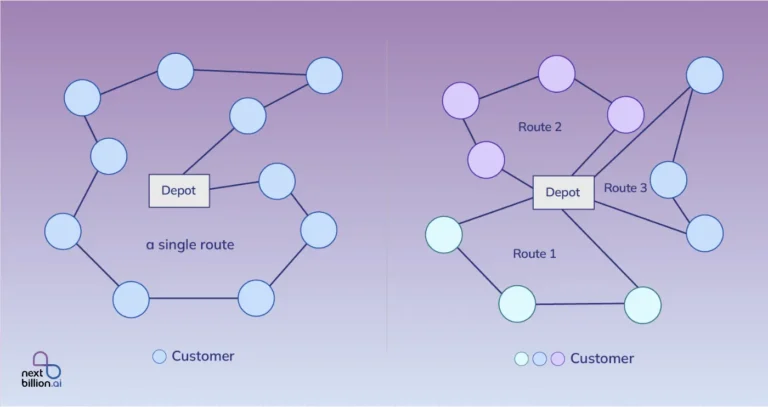
When these challenges arise, it’s time to explore advanced route optimization tools like NextBillion.ai Route Planner. These tools are designed for scalability and efficiency, offering features such as:
- Real-time route updates and traffic integration.
- Optimization based on complex constraints like delivery schedules, vehicle capacities, and driver preferences.
- Support for handling thousands of stops with ease.
- Seamless integration with your existing workflows and systems.
NextBillion.ai Route Planner enable businesses to improve efficiency, reduce costs, and provide better customer service, making it an ideal solution for growing operations. Transitioning to such tools ensures your logistics processes remain scalable and effective, no matter how complex they become.
Route Planning with NextBillion.ai Route Planner using Excel for more than 100 Stops
NextBillion.ai Route Planner is designed to tackle route planning challenges. With its ability to process large datasets and optimize routes for various parameters, it integrates seamlessly with Excel for efficient route planning. Here’s a step-by-step guide to using NextBillion.ai’s Route Planner with Excel.
Step 1: Access the Route Planner
- Visit the NextBillion.ai Route Planner.
- If you don’t have an account, reach out to the support team for assistance with access and account creation.
Step 2: Choose Your API Type
1. Click the Start button on the dashboard.
2. Select the API type:
- Fast: Prioritizes quick results.
- Flexible: Offers more customization for specific use cases.
- Fast: Prioritizes quick results.
3. Click Next to save your configuration.
Step 3: Prepare and Upload Data
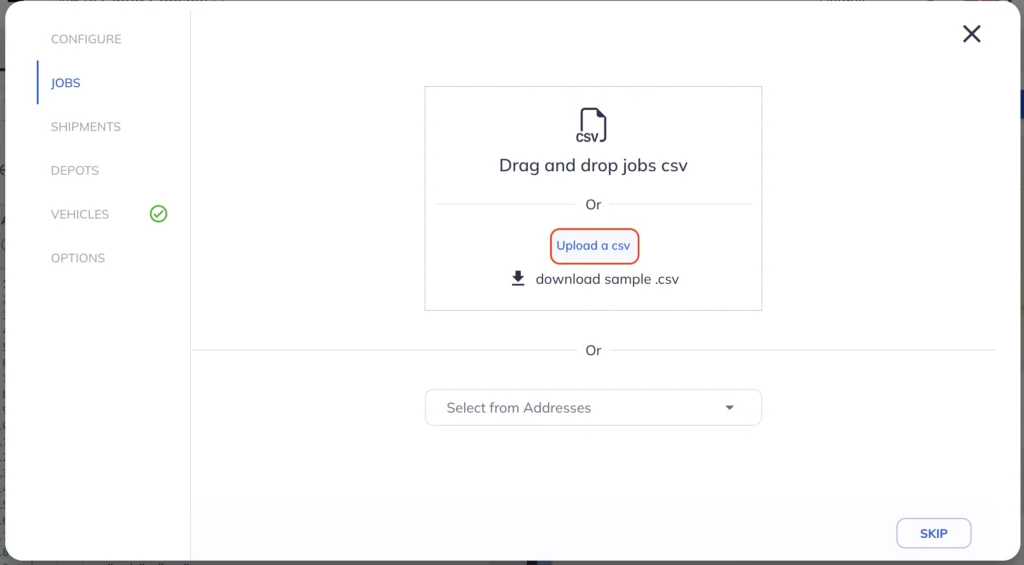
A. Jobs Data (Delivery Tasks)
1. Create a CSV file with the following columns:
- id: Unique identifier for each job.
- description: Job details or notes.
- latitude & longitude: Geographic coordinates for the stop.
- pickup: Boolean value indicating if the location is a pickup point.
- id: Unique identifier for each job.
2. Alternatively, download a sample CSV from the dashboard for reference.
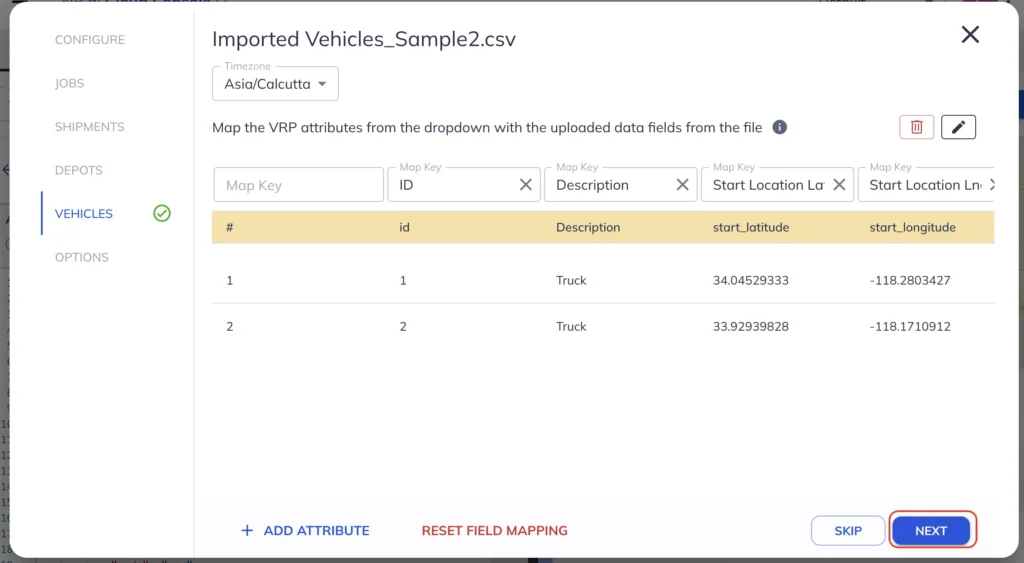
B. Vehicle Data
- Create a CSV file with these parameters:
- id: Unique identifier for each vehicle.
- vehicle_description: Details about the vehicle.
- capacity: Vehicle capacity for deliveries.
- start_latitude & start_longitude: Starting point coordinates.
- end_latitude & end_longitude: Ending point coordinates.
- shift_start & shift_end: Vehicle operating hours.
- max_tasks: Maximum number of tasks per vehicle.
- id: Unique identifier for each vehicle.
C. Shipment Data (Optional)
If handling shipments, replace the Jobs CSV with a Shipments CSV containing:
- pickup_id: ID of the pickup location.
- delivery_id: ID of the delivery location.
- pickup_latitude & pickup_longitude: Pickup location coordinates.
- delivery_latitude & delivery_longitude: Delivery location coordinates.
- description: Notes about the shipment.
D. Depot Data
- Upload a Depot CSV to specify central locations for route optimization.
- Include details like depot ID, name, latitude, and longitude.
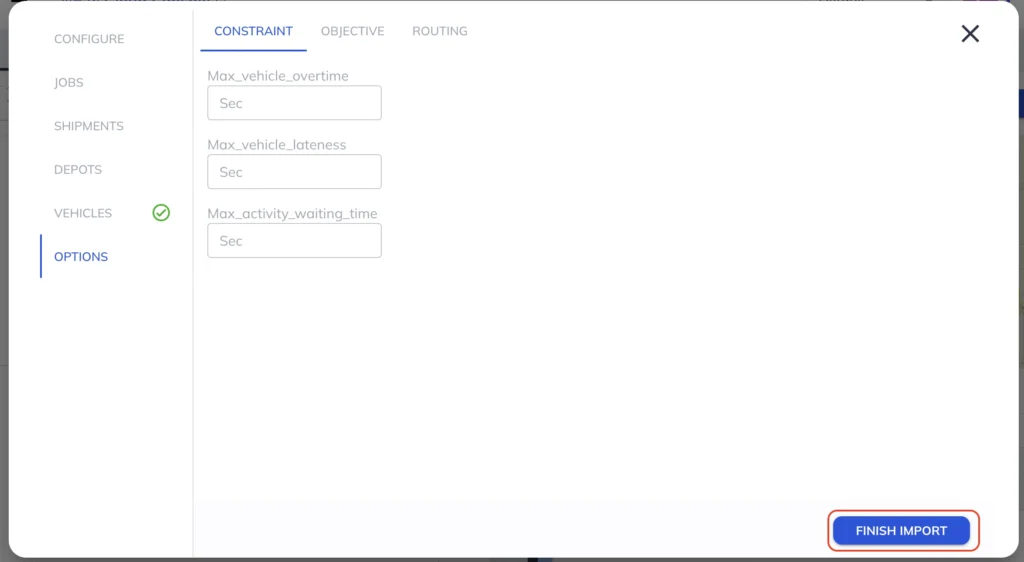
Step 4: Configure Options
- Constraints Options:
Set maximum values for:
- Vehicle overtime (max_vehicle_overtime).
- Vehicle lateness (max_vehicle_lateness).
- Activity waiting time (max_activity_waiting_time).
2. Objective Options:
Choose the primary optimization goal:
- Travel Cost: Distance or duration.
3. Routing Options:
- Select mode of transportation: Car or Truck.
- Set a traffic timestamp for real-time traffic considerations.
- Select mode of transportation: Car or Truck.
Step 5: Import and Visualize Data
- Once all CSV files are prepared and uploaded, click Finish Import to import them into the tool.
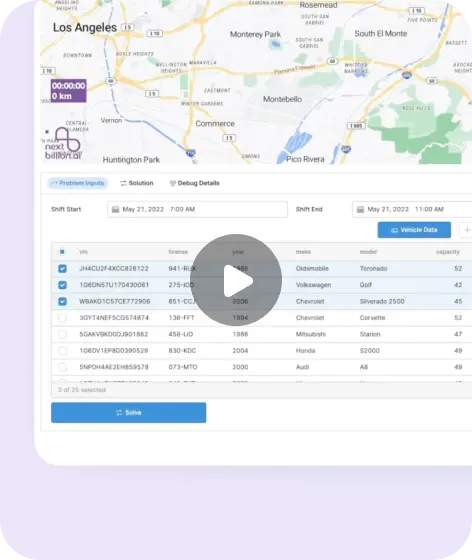
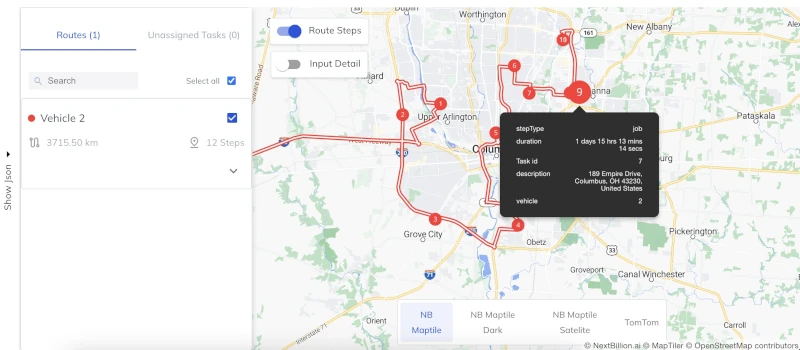
- Click Compile to visualize all stops and vehicles on the route planner interface.
Step 6: Run the Route Planner
- Click the Run button to execute the route optimization process.
- The tool will generate optimized routes based on your input data and constraints.
Review the results and export the optimized routes for your delivery operations.
Why Choose NextBillion.ai Route Planner?
- Handles High Volumes: Manage more than 100 stops with ease.
- Customizable Constraints: Optimize routes based on unique business needs.
- Advanced Features: Incorporate real-time traffic, delivery windows, and vehicle-specific considerations.
- Seamless Integration with Excel: Simplify data preparation and upload for a smooth workflow.
By using NextBillion.ai, businesses can scale their operations, improve efficiency, and deliver a superior customer experience.
Boost Efficiency and Cut Costs with Smarter Route Planning
Excel is a great starting point for route planning, especially for small businesses. It helps you manage deliveries and keeps things organized. However, as your business grows and the demands on your operations increase, you may find that Excel no longer meets your needs. When handling more stops, needing real-time updates, or requiring dynamic optimizations becomes a challenge, it might be time to explore more advanced solutions.
NextBillion.ai Route Planner can help take your business to the next level. It’s designed to handle large volumes of stops, provide real-time updates, and optimize routes based on various factors like delivery time windows and vehicle capacities. By switching to a tool like NextBillion.ai, you can save time, improve delivery efficiency, and keep your customers satisfied.
If you’re ready to streamline your route planning and grow your business without the limitations of Excel, NextBillion.ai is here to help. It’s easy to use, and it’s built for businesses that need more than just basic route planning.
About Author
Shivangi Singh
Shivangi is a seasoned Technical Writer with a passion for simplifying technical concepts. With over 5 years of experience, she specializes in crafting clear and concise documentation for various technical products and platforms.

